Connect a Personio Account to Honeypot (and Save Time)
Product Emma Tracey
Personio is one of Germany’s largest Applicant Tracking Systems, serving over 3,000+ users—many of whom are also Honeypot customers! With a few easy clicks, Honeypot customers with a Personio subscription can set up a connection between the two platforms.
This integration enables recruiters to automatically send candidate details from the Honeypot platform to Personio. This reduces manual effort for recruiters and hiring managers, streamlining workflows so you can focus on follow-up rather than data entry.
Once the connection between Honeypot and Personio is established, any developer who accepts an interview invite sent from your account will trigger the process. Once triggered, the developer’s data is automatically forwarded to Personio with the source label ‘Honeypot’. Forwarded data will include the original message sent by the Honeypot user as well as the candidate’s CV (saved as a PDF) and Honeypot profile.
If you need any help, your Customer Success Manager is on standby to help you through the process!
How to set up your Personio integration on Honeypot
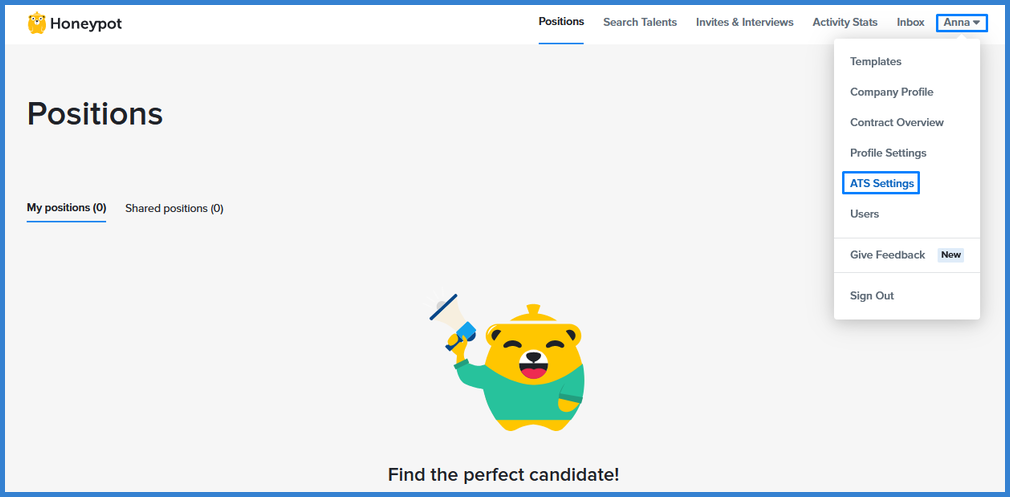
1.) Log into the Honeypot platform and click your name on the top right corner of the top navigation menu. Select ATS Settings from the dropdown menu. This will redirect you to a new page with all Honeypot ATS connection options.
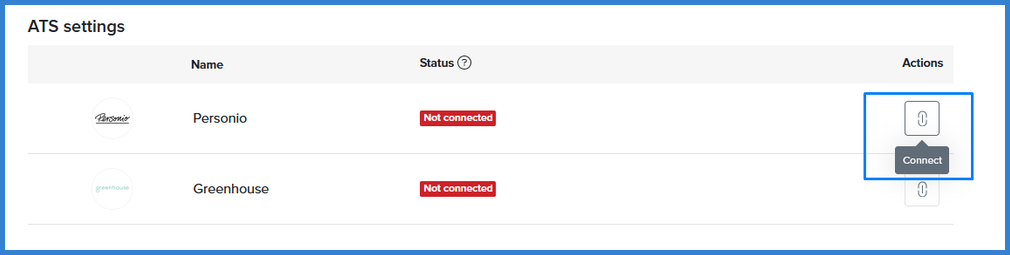
2.) Navigate to the Personio section and click the associated button labelled Connect.
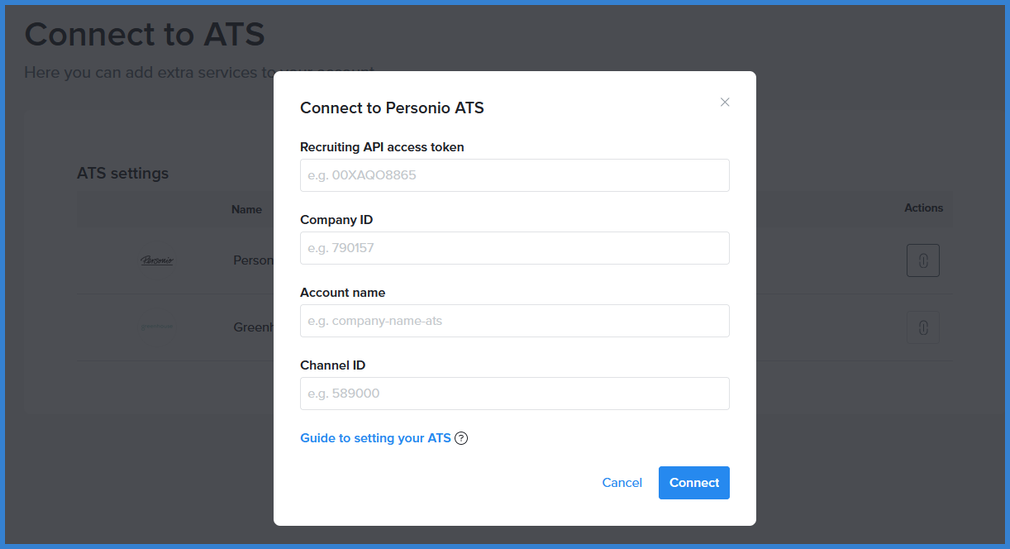
3.) Enter the account details requested in the pop up. These are related to your Personio account and can be found on the Personio platform. Once this information is entered, click Connect, and you’re done!
If you need help locating this data on Personio, continue to the walkthrough below.
How to locate required Personio account details
To find the relevant Personio account details, log into the Personio platform using the account you would like to connect. Next, there are four specific pieces of information to copy and paste.
1.) API Access Token and Company ID
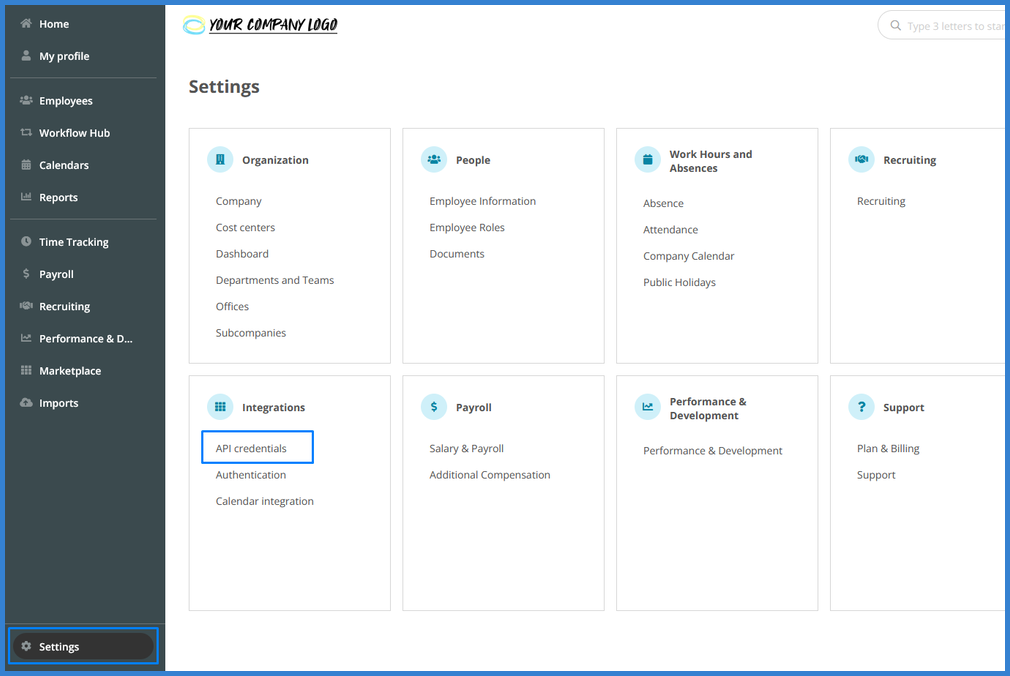
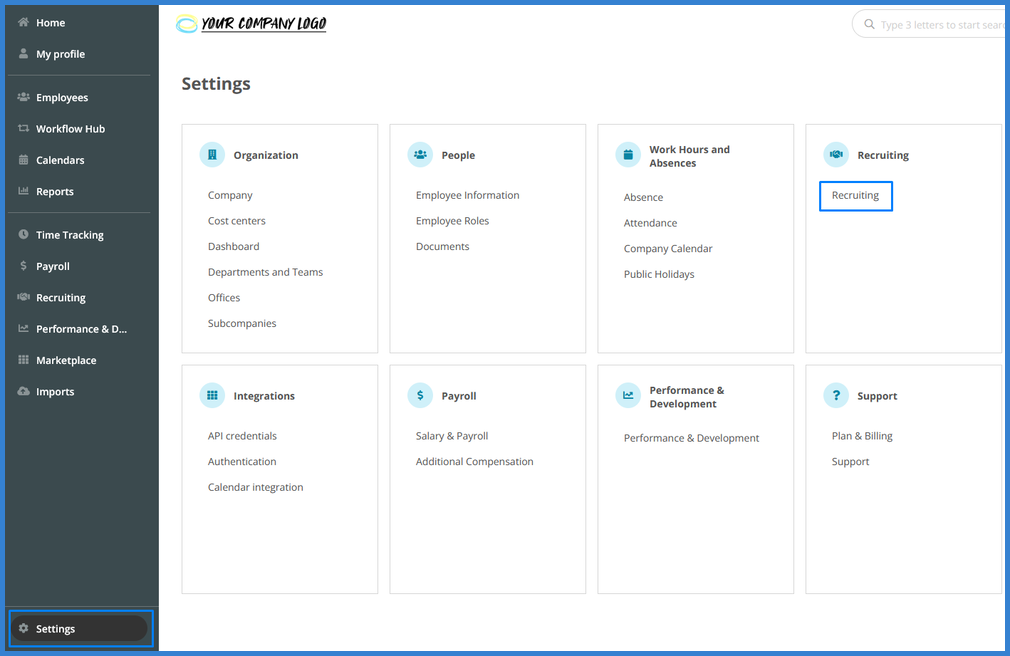
Click Settings on the bottom of the left navigation menu and then API Credentials. Once on the API credentials page, click on listed option. This will reveal the account’s API access token and the company ID.
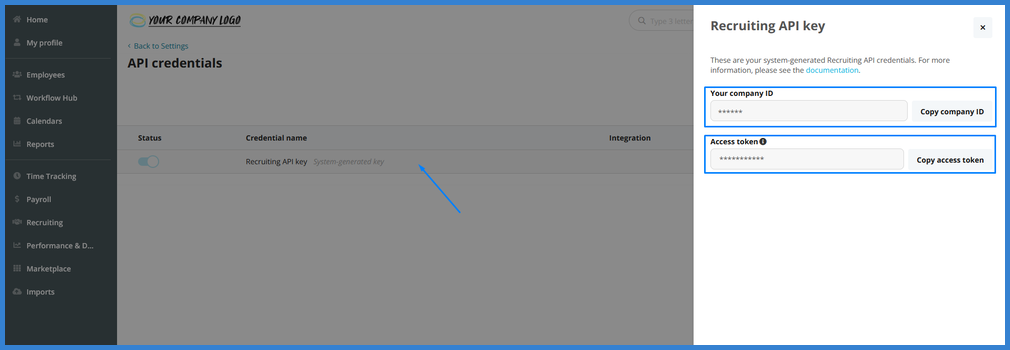
Copy the supplied token by clicking Copy access token and paste it into the form on the Honeypot platform, into the first field called Recruiting API access token.
Copy the supplied company ID by clicking Copy company ID and paste it into the form on the Honeypot platform, into the second field called Company ID.
2.) Account Name
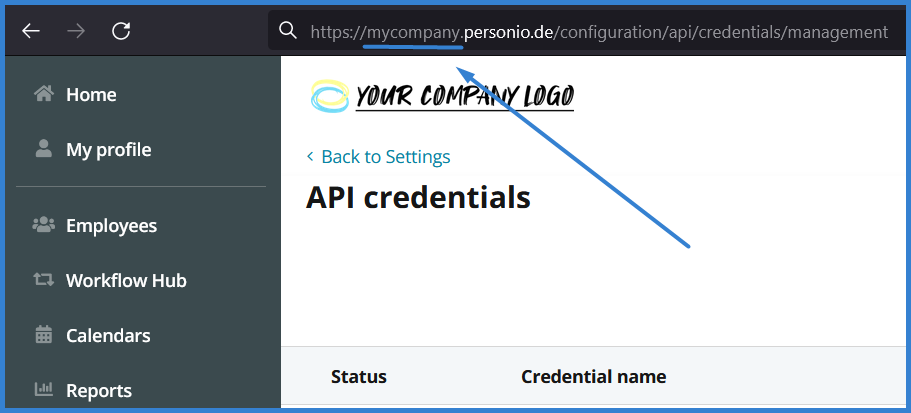
Locate the URL bar in your browser. The text before .personio.de is your company’s account name. For example, if the URL is https://mycompany.personio.de/, the account name is mycompany. While using the Personio platform, copy the text between https:// and .personio.de and paste it into the Honeypot platform, into the third field called Account name.
3.) Channel ID
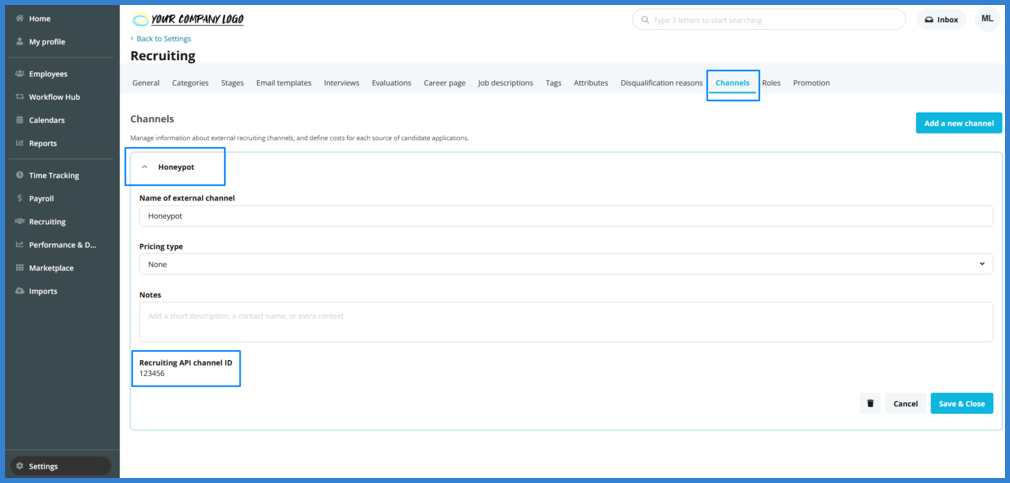
Click Settings on the bottom of the left navigation menu and then Recruiting. Once on the Recruiting page, select Channels tab on the top navigation menu.
If someone in your organisation has already created a channel for Honeypot, this will appear as an option. Simply click the channel name and then copy the supplied Channel ID. Paste this number into the form on the Honeypot platform, into the fourth field called Channel ID.
If your Channels list does not yet include an option for Honeypot, you will need to create this channel. Select the option Add new channel… and follow the steps. Once this is completed, click on the newly created channel and then copy the supplied Channel ID.
4.) Enable XML Feed
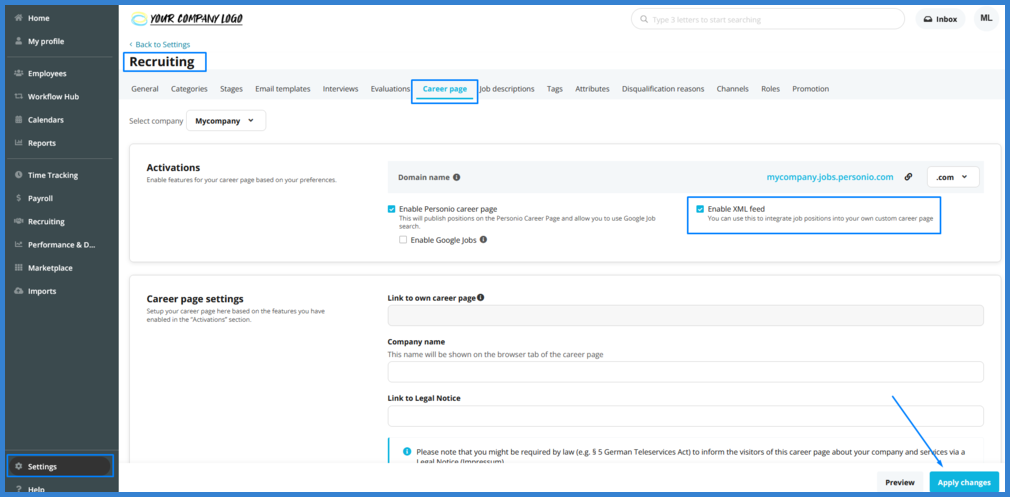
Make sure you have enabled the XML feed on Person.io:
- Navigate to Settings > Recruiting > Recruiting.
- In the tab Career page, go to Activations.
- Activate the checkbox Enable XML feed.
- Then click Apply changes in the bottom-right corner.
5.) Connect
Once all the fields have been filled in, click on the Connect button and you’re done!